
This article will show you how to prepare the ADAS Calibration for the AI-14 cameras. If you are looking for the steps for installing the camera, please visit this Support Article:
Navistream Camera AI-14 Installation Instructions
The dashcam can gather information about the road ahead and detect events such as the critical distance with road-facing Advanced Driver Assistance Systems (ADAS). To enable road-facing ADAS, you must take a few measurements listed below. These measurements can be taken in centimeters or inches:
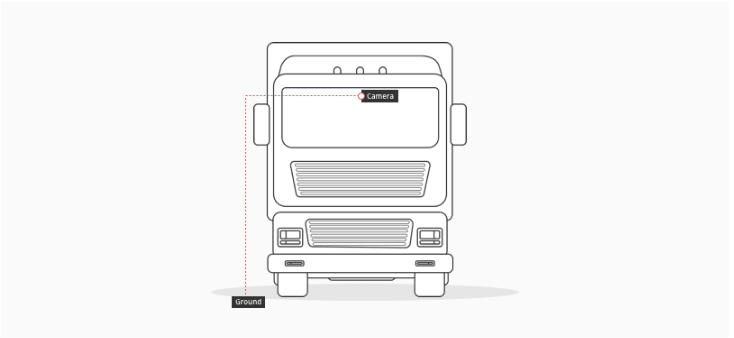
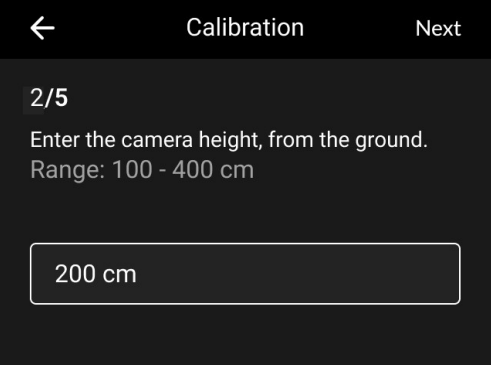
The dashcam height from the ground
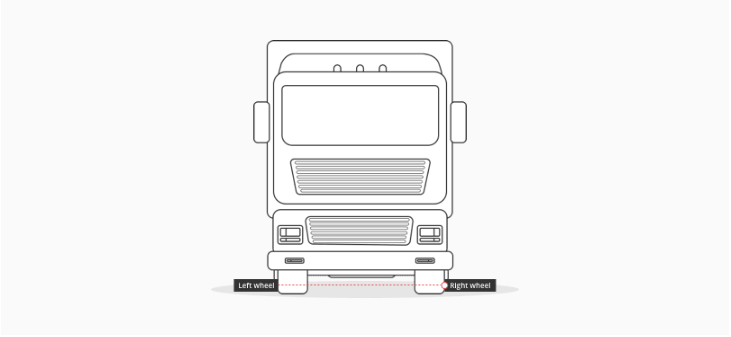
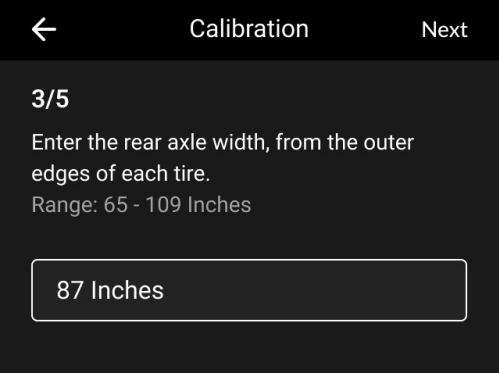
The width of the front axle from the outer edges of each tire
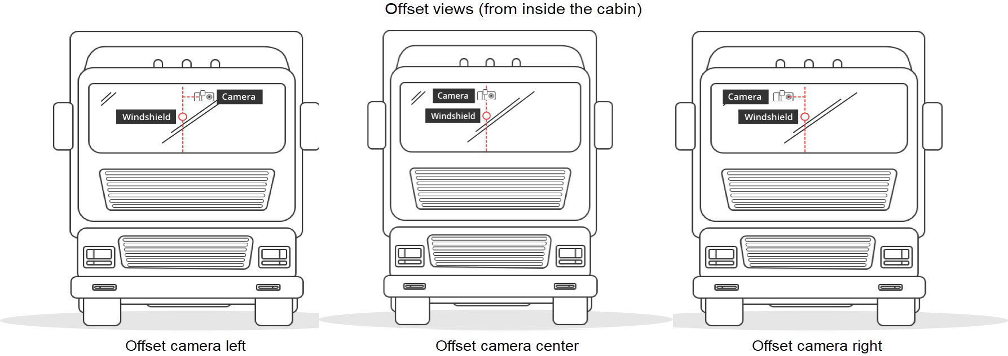
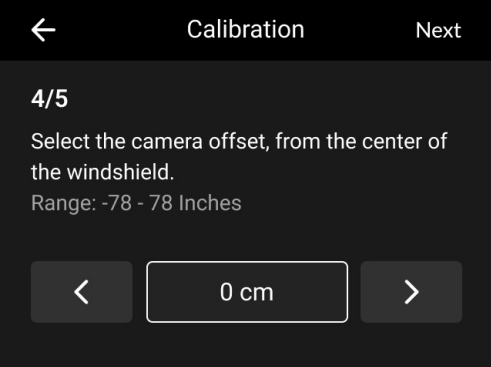
The dashcam offset from the center of the windshield, measured from inside the cabin.
When the dashcam is centered on the windshield - enter 0
When the dashcam is to the right of the center of the windshield - enter a negative measurement
When the dash cam is to the left of the center of the windshield - enter a positive value
Once you have the measurements follow the instructions below to begin the ADAS Calibration.
Step 1: Accessing the ADAS Settings
Unlock the dash cam: Enter the PIN to unlock the device. The default PIN is 3333.
Navigate to Settings: Select Settings from the main menu.
Step 2: Entering Measurements
Select ADAS Calibration: Scroll to and select ADAS - Not calibrated
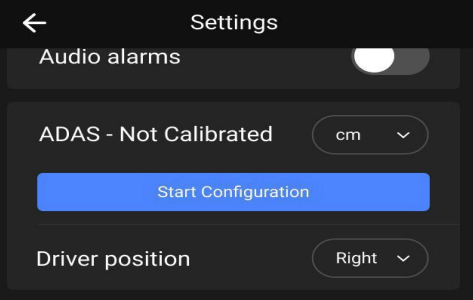
Select the units from the drop-down menu: Inches or centimeters.
Adjust measurements: Tap the measurement bar, enter the height, and tap Next.
Tap the measurement bar, enter the axle width, and tap Next.
Use the arrows to adjust the camera's offset from the center of the windshield. The
left arrow decreases the value (up to -200 cm), and the right arrow increases it (up to
+200 cm). Tap Next.
Review all the entered measurements on the final screen.
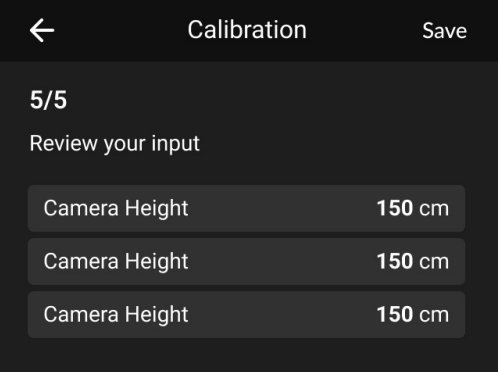
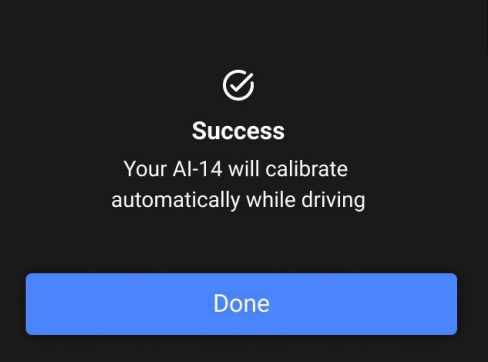
Tap Save to finalize the measurements. The camera will then begin auto-calibration.
If you have any questions or issues completing the ADAS Calibration, please contact Navistream Support.
Navistream Support
1(844)571-8200 Ext 2
navistream@stti.ca