As of an update in Feb. 2024 you're now able to see, manage and update your Navistream cameras via our web portal (www.mynavistream.com
To access this information and take advantage of these features, please refer to the information below.
- Access the Cameras section of our Administration page

- This will open up the Cameras page. Here you can see the Asset Tag (CAM-##### or C######) of your purchased cameras, the vehicle they're assigned to, and other information such as their online status and last known location.

- To view the details of a camera, change the vehicle assignment or make any other updates press the Open button on the left of the list, beside the Asset Tag.

- This is the view camera screen. Pressing the open button above takes you here. There are a variety of things you can do on this page. See below the image for more information.
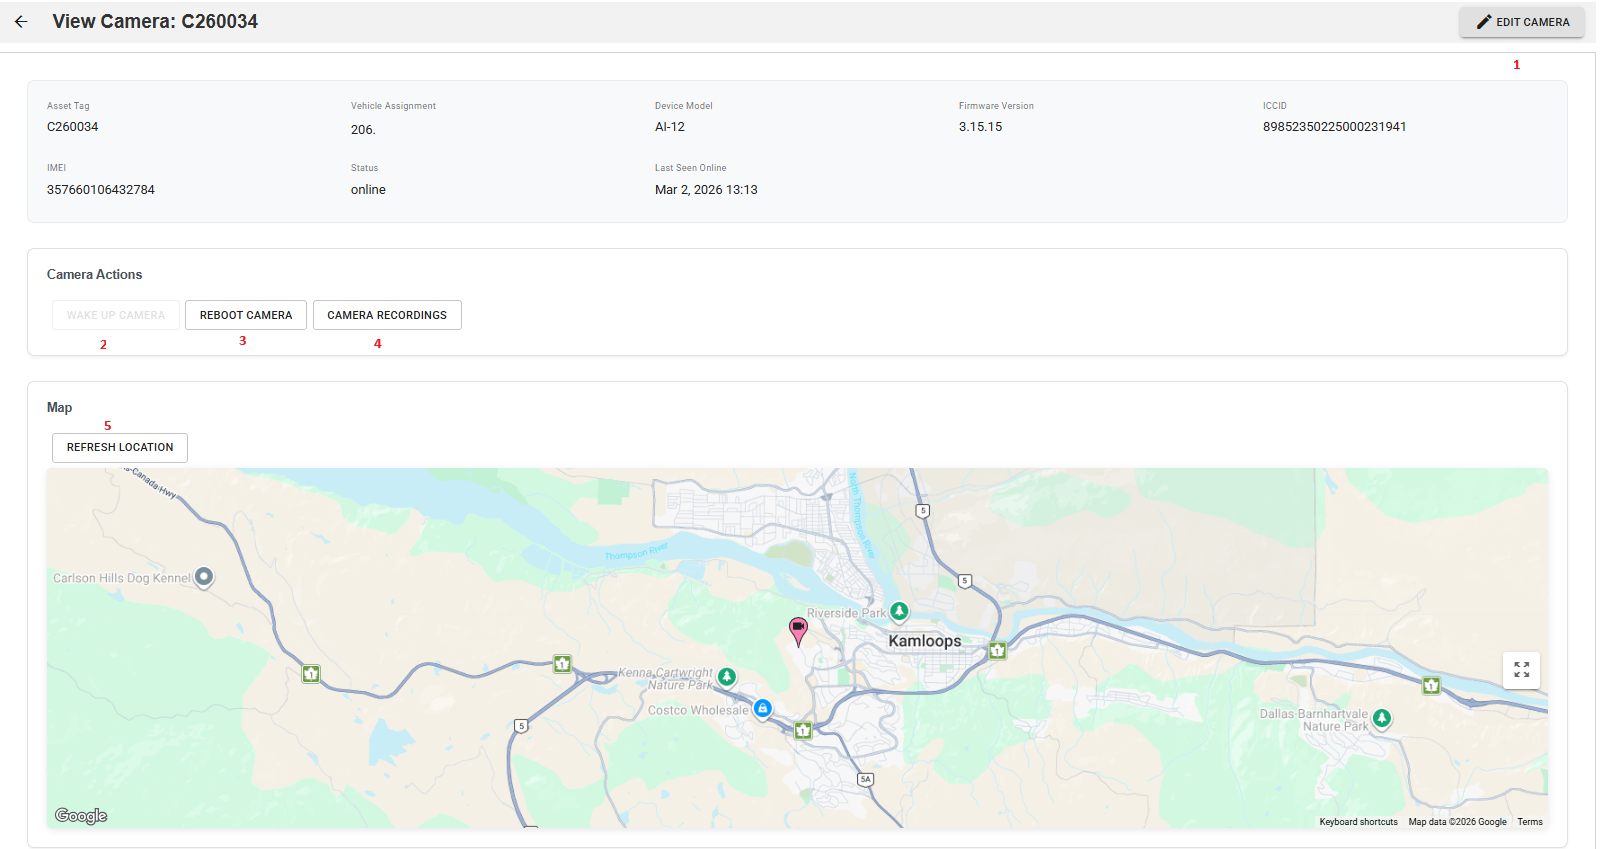
- Edit Camera/Save Changes- Press this button to make changes to the camera. This is where you can update the current vehicle assignment, or other features. This button changes to Save Camera after pressing it. If you make any changes be sure to press the save button!
- Wake Up Camera - If the camera is sitting stationary, it may be in standby. Press this button to wake the camera up if necessary.
- Reboot Camera - Press this button to reboot the camera. This may be helpful if troubleshooting an issue you're experiencing.
- Camera Recordings - Press this button to be taken to the Camera Recordings page for this camera. More information about viewing and retrieving camera recordings can be found here:
https://navistream.stti.ca/en/support/solutions/articles/1000319204-navistream-camera-how-do-i-remotely-access-video-recordings- - Refresh Location - Reloads the current page and updates the map at the bottom of the screen with the latest known location of the camera.
- Edit Camera/Save Changes- Press this button to make changes to the camera. This is where you can update the current vehicle assignment, or other features. This button changes to Save Camera after pressing it. If you make any changes be sure to press the save button!